If you haven't installed the Journity code, you'll want to do that first. Check out our guide on installing the Journity code if you need help on that.
Now, it's time to engage your audience and start driving success for your organization, by setting up your first Waypoint.
What’s a Waypoint? It’s a targeted message to a specific audience segment on your site. Waypoints can appear as personalized popup messages or embedded messages within the content/layout of your site.
Login into Journity and let’s get started.
To create your first Waypoint, choose from one of the 3 options depending on your goal.

One of the most common Waypoints organizations start with is email acquisition.
For this example, let’s create a Waypoint to grow your email list. Click your selection to launch the Waypoint editor.
Adjust Your Settings:
- Start by naming your Waypoint at the top of the editor then select the Waypoints tab under Settings.
- The “Type” will autofill to collect email address.
- Select your “Style”. Waypoints can live on your site as either an overlay (popup) or an embed (appears as part of your site’s layout).
- Next, select how you’d like to manage the email data you’ll obtain through this Waypoint - export data into a spreadsheet or set up a 3rd party integration to Mailchimp.
- Don’t forget to set your date range and frequency (how often a user will see the message).
- For more information on tracking conversions, tags and events, use the guided tour on your dashboard for a detailed walk through of each feature. Access the guided tour by selecting this icon on the homepage of your dashboard at the top near your username.

Design Your Waypoint:
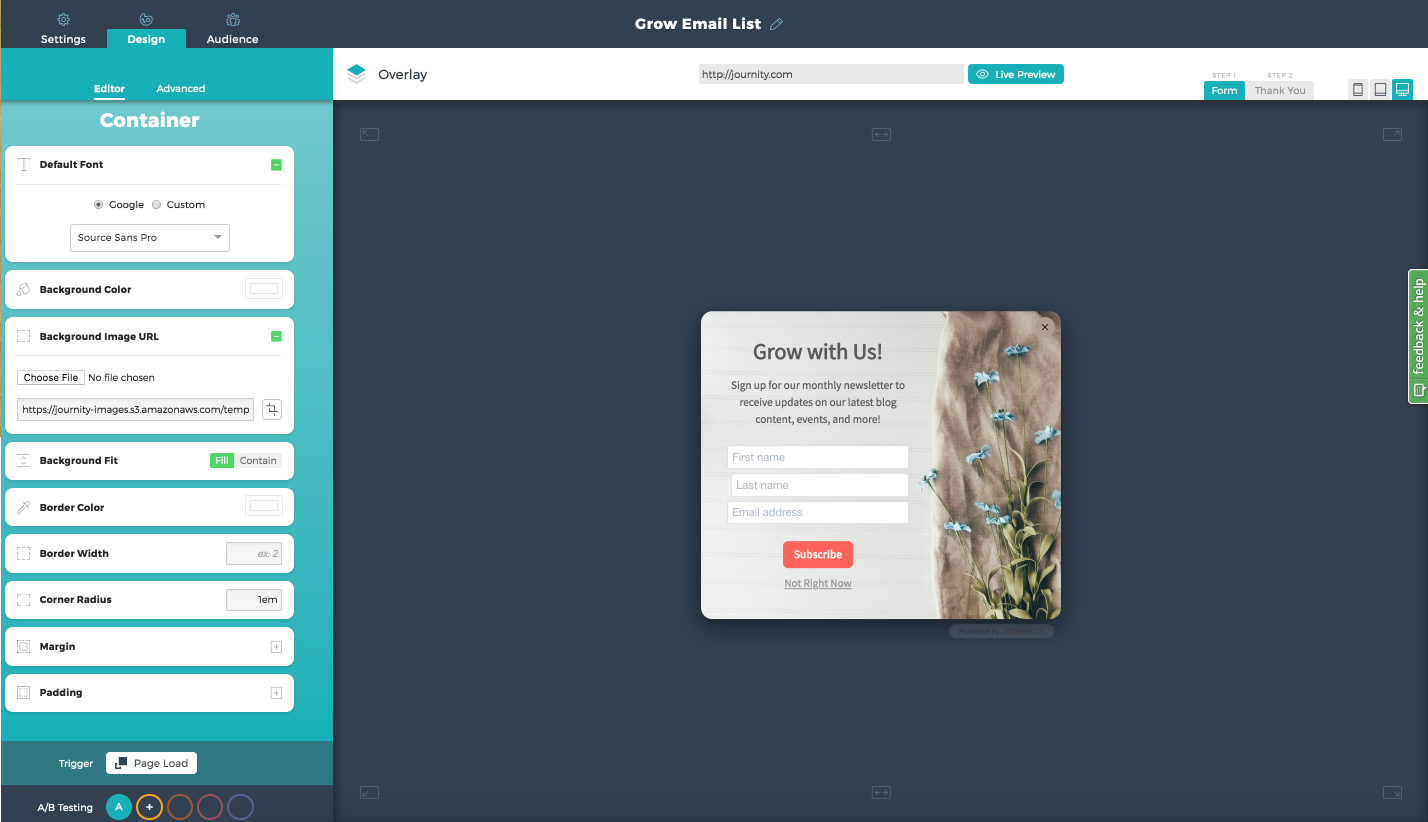
The design editor is full of basic and advanced design options. Test your skills or use what we’ve created to help you get started. At any time you can see a live preview of the Waypoint on your site by clicking the “Live Preview” button.

Use our simple and hassle-free editor to design a waypoint that reflects your brand, campaign and goal. You have a full range of design features, including templates and advance design options that allow you to create eye-catching waypoints in minutes.

Test your images, headlines and calls-to-action by setting up A/B tests. You can test up to five variations of your Waypoint to see which one performs the best by selecting the A/B+ option at the bottom of the Design tab.
And finally, set choose your audience.
Determine the Audience:
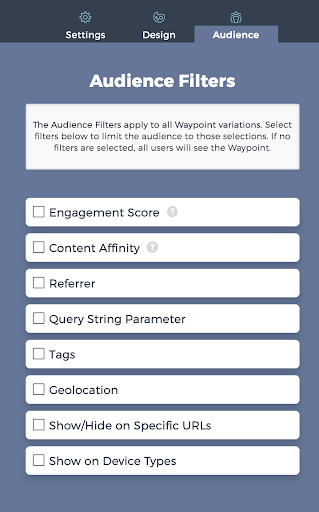
The audience filters apply to all Waypoint variations. Select filters to limit the audience that sees your message. If no filters are selected, all website visitors will see the Waypoint. You can determine your audience by how engaged they are on your site, what content they look at, where they came from (i.e. Facebook ad or landing page), geolocation and more.

If you have any questions, email us at customersuccess@journity.com.
