When we spend our time, effort and limited resources on campaigns, we expect them to perform! We get it. And that’s why we’ve provided the best practices for achieving optimal results with your Waypoints!

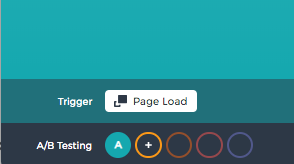
A/B Testing - it’s a no-brainer and we’ve made it easy for you! Start by setting up your first Waypoint in the Design tab. Once your test Waypoint is complete, select the “+” sign to create a copy of the original (control test).
Test features such as design (copy, images, button colors), positioning, triggers, or calls-to-action.

Journity allows for testing multiple variations, however, in most cases it's best to stick to just two, unless you have a lot of traffic. This will ensure you collect enough data on each version to know which one performed best quickly. When setting up a new version for testing we recommend only testing one change. If you change the headline, CTA and background image you will not be able to determine which change actually caused the results.
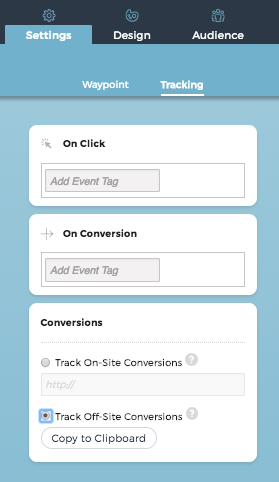
- Track on-site conversions. Enter a specific page that indicates when a conversion has been made. For example, select the URL for a “thank you” landing page. This will indicate the donation was complete and the visitor was sent to the “thank you” page.
- Track off-site conversions. If you are unable to use a link to the "thank you" page on your website, or if you use a 3rd party provider for your donations (such as Raiser's Edge, or Raisedonors) you can add the 3rd party tracking code to the "thank you" page and it will track conversions for you.

Ensure you’re using the right tags.
- Waypoint Tags:
- Waypoint tags help you organize and keep track of the types of messages you’re creating. Each Waypoint can have an unlimited number of tags in Journity.
- Event Tags:
- Tag individual users based on their interactions with your Waypoint instead of tagging the Waypoint itself. Event tags help us retarget visitors. For example, event tags help us know who is interested in a donation campaign, but didn’t donate.
The key is to make sure the RIGHT audience is selected for the message and goal of the Waypoint. For example, when setting up a Waypoint for a local event in Denver, select your audience using the Geolocation feature for zip codes in and around Denver. This ensures only website traffic located in the Denver area will see your Waypoint.
Now that you’re equipped with the best practices, start achieving optimal results today! Login to Journity and adjust your Waypoints based on the tips above!
As always, shoot us an email at customersuccess@journity.com if you have questions!
